
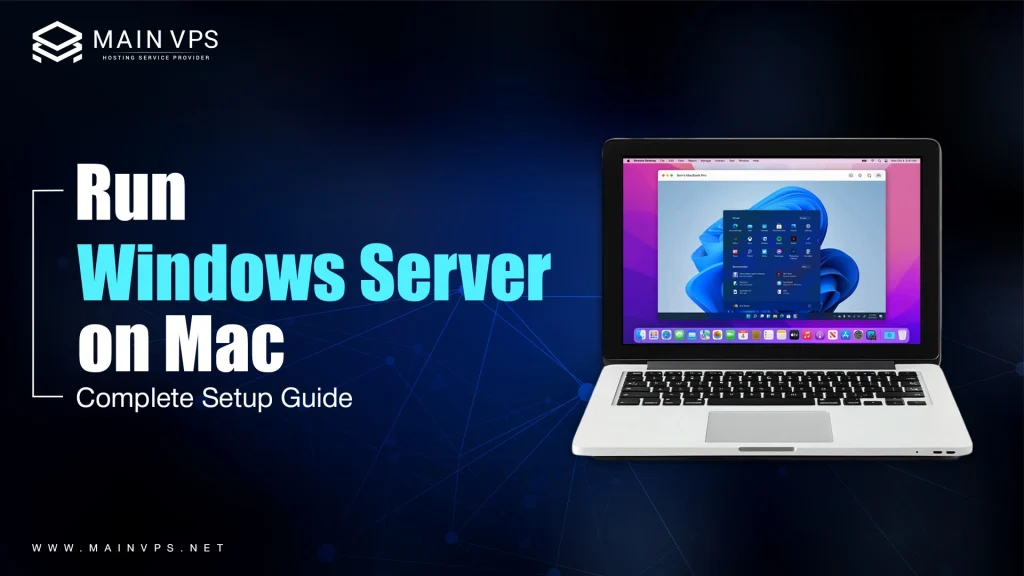
The boundaries between operating systems are blurrier than ever in the contemporary work environment, where multiple platforms are used. If you are a developer, IT administrator, or SEO expert, there are seldom occasions when you will not be required to run a Windows Server on Mac for various reasons like testing, remote access, or running particular applications such as Active Directory, IIS, or SEO tools like Scrapebox or GSA SER. The real question is, how can you efficiently run a Windows Server on these devices without compromising performance or security?
Let’s break it down.
Why Run Windows Server on a Mac?
Let’s be real: macOS is sleek, secure, and great for productivity, but sometimes you need Windows. Especially when it comes to:
- Running enterprise-level Windows applications
- Testing Windows-based servers or environments
- Using Windows-only SEO and automation tools
- Creating cross-platform software development environments
Using a Windows Server Mac setup gives you the best of both worlds: macOS’s stability and Windows’s compatibility.
Top Ways to Run Windows Server on a Mac
1. Virtualization Software (Recommended)
The easiest and most reliable way to run Windows Server on macOS is through virtualization software. These tools create a virtual machine (VM) that runs within macOS.
Best Tools:
- Parallels Desktop Pro – Designed specifically for professionals, it supports Windows Server 2019, 2022, and older versions. Offers near-native performance and seamless integration.
- VMware Fusion – a robust virtualization platform for running multiple operating systems. Great for heavy-duty use.
- UTM – Free and open-source. A bit more technical but perfect for advanced users on Apple Silicon (M1/M2).
How to Set It Up:
- Download an ISO image of Windows Server from Microsoft’s official site.
- Open Parallels or VMware and create a new virtual machine.
- Assign sufficient resources, a minimum of 2 cores and 4GB RAM (more for better performance).
- Install Windows Server as you would on a regular PC.
Pro Tip: If you’re using Apple Silicon (M1/M2/M3 chips), not all Windows Server versions are compatible. Stick with Windows Server 2022 ARM64 or use UTM for best support.
2. Boot Camp (Intel Macs Only)
If you have an Intel-based Mac, you can use Boot Camp to install Windows Server on Mac natively. However, Boot Camp doesn’t officially support Windows Server; you’ll need to tweak installation settings or create a custom ISO. Plus, Apple has phased out Boot Camp for M1/M2/M3 Macs.
So while it’s powerful, it’s not the most user-friendly method, especially for server use.
3. Remote Desktop to a Windows Server VPS
If you don’t want to install anything on your Mac, just connect to a Windows server using Remote Desktop Protocol (RDP). This method is:
- Cloud-based: No local resources are used.
- Fast and scalable: Perfect for running SEO tools 24/7.
- Flexible: Access from anywhere.
Use apps like Microsoft Remote Desktop (free on the Mac App Store) to log into a cloud VPS. Services like MainVPS, Vultr, or InterServer offer affordable, USA-based Windows Server VPS options.
4. Use a Dedicated Windows Server
If you need maximum performance, complete control, and dedicated resources, renting a dedicated Windows Server is an excellent option. Unlike virtual machines, a dedicated server provides exclusive access to all hardware resources, making it ideal for enterprise applications, database hosting, virtualization, and large-scale development projects.
Benefits
- Dedicated CPU, RAM, and storage
- Better performance for resource-intensive workloads
- Full administrator access
- Enhanced security and reliability
- Suitable for production environments
This option is best for businesses, developers, and IT professionals who require consistent performance without sharing resources.
5. Run Windows Server with Docker Containers
If your goal is application development or testing, Docker can be a lightweight alternative to running a complete virtual machine. Docker allows you to package applications into isolated containers, making deployment faster and more efficient.
Advantages
- Faster startup than traditional virtual machines
- Lower memory and CPU usage
- Easy application deployment
- Consistent development environment
- Supports CI/CD workflows
Although Docker cannot replace a full Windows Server installation in every scenario, it is an excellent choice for developers working with containerized applications.
6. Use a Cloud-Based Windows Server
Cloud providers allow you to launch Windows Server instances within minutes without installing anything on your Mac. You simply connect using Remote Desktop and start working.
Benefits
- Instant deployment
- High availability
- Flexible resource upgrades
- Pay-as-you-go pricing
- Automatic backups and snapshots
Cloud Windows servers are suitable for remote teams, software testing, hosting applications, and business workloads.
7. Install Windows Server on an External SSD
If you don’t want to use your Mac’s internal storage, consider installing Windows Server on a high-speed external SSD. This approach keeps your macOS installation separate while providing additional storage flexibility.
Advantages
- Saves internal disk space
- Easy to disconnect when not needed
- Portable setup
- Faster than using a standard USB drive
- Ideal for testing environments
This option works best with Intel-based Macs and compatible virtualization software.
Choosing the Best Method
The right approach depends on your workload and hardware.
| Method | Best For | Performance | Ease of Setup |
|---|---|---|---|
| Virtualization (Parallels/VMware) | Development, Testing | High | Easy |
| Boot Camp (Intel Macs) | Native Windows Performance | Excellent | Moderate |
| Remote Desktop VPS | Remote Work, SEO Tools | Excellent | Very Easy |
| Dedicated Windows Server | Enterprise Workloads | Maximum | Easy |
| Cloud Windows Server | Flexible Business Hosting | Excellent | Easy |
| Docker Containers | Developers | High | Moderate |
| External SSD Installation | Portable Testing | Good | Moderate |
System Requirements for Running Windows Server on Mac
Let’s be honest: Run Windows Server on Mac isn’t light. Your Mac needs to have some muscle.
Minimum Requirements:
- Processor: Dual-core Intel or Apple Silicon (M1/M2)
- RAM: At least 8GB (16GB+ preferred)
- Storage: 100GB SSD minimum
- Software: Latest version of Parallels/VMware/UTM
Recommended Specs for Heavy Use (e.g., SEO tools):
- Quad-core CPU
- 16GB+ RAM
- SSD with 200GB+ space
- External backup drive or Time Machine setup
Performance Tips for Running Windows Server Smoothly on Mac
- Allocate Sufficient Resources – Don’t starve your VM. Give it enough RAM and CPU cores.
- Use SSD Storage – Speeds up boot time, file access, and overall VM performance.
- Enable Integration Features – Parallels lets you drag and drop files between macOS and Windows use it.
- Use Lightweight Server Roles – Don’t install everything unless needed. Focus on roles like IIS or DNS.
- Disable Background Mac Apps – Free up RAM and CPU for your virtual machine.
- Snapshot Before Changes – Use VM snapshots before installing big updates or apps. Roll back if something breaks.
Security Considerations
Follow these security best practices to keep your Windows Server VM safe while running on your Mac:
- Keep Windows Server Updated: Install the latest security patches and updates to protect against vulnerabilities.
- Use a Strong Administrator Password: Create a unique password with a mix of letters, numbers, and special characters.
- Enable Windows Firewall: Keep the firewall active and allow only the necessary network ports.
- Install Microsoft Defender or antivirus software: Use reliable antivirus software to protect against malware and cyber threats.
- Back Up Your VM Regularly: Create backups or snapshots to recover your data in case of system failure or accidental data loss.
- Secure Remote Access: If using Remote Desktop (RDP), enable Network Level Authentication (NLA) and use strong login credentials.
Final Thoughts
The perception of running a Windows Server on a Mac may seem like an over-the-top technological stunt, yet, with the appropriate resources, it is surprisingly effortless and unbelievably effective. For testing environments, SEO campaign execution, or cross-platform application development, the availability of macOS paired with Windows Server is transformative.
If you’re on a newer M1/M2 Mac, your best bet is virtualization through Parallels or UTM. For Intel Macs, you’ve got more flexibility with Boot Camp. And if you want a no-hassle solution, RDP into a USA-based Windows VPS and keep your Mac clutter-free.
Either way, you’re not stuck choosing between ecosystems anymore you can have both.
FAQs
1. Can I run Windows Server on an M1 or M2 Mac?
Yes, you can run Windows Server on Apple Silicon (M1/M2) Macs using virtualization tools like UTM or Parallels Desktop. However, make sure to use the ARM64 version of Windows Server, as traditional x64 versions are not supported natively on these chips.
2. Is it legal to run Windows Server on a Mac?
Yes, it is legal as long as you have a valid Windows Server license. Always ensure you’re complying with Microsoft’s licensing terms, especially when using it in a virtualized environment.
3. Which is better for SEO tools: Local VM or VPS?
If you run heavy-duty tools like Scrapebox or GSA SER, a Windows VPS (like MainVPS) is better due to 24/7 uptime, dedicated IPs, and high bandwidth. A local VM is best for testing or low-frequency use.
4. How much RAM do I need to run Windows Server on my Mac?
At the very least, you need 8GB of RAM. However, 16GB or more gives the best flexibility when it comes to multitasking or performing server role activities. Additionally, don’t forget that Mac OS requires resources too, so it’s advisable not to allocate all RAM to the virtual machine.
5. Can I access my Windows Server VM remotely?
Absolutely. Both Parallels and VMware offer remote access features. You can also enable Remote Desktop within your Windows Server settings to access it from another device, just like a real server.
Suggestions:
- https://mainvps.net/blog/linux-reseller-hosting/
- https://mainvps.net/blog/lifetime-web-hosting-2026/
- https://mainvps.net/blog/windows-reseller-web-hosting/
- https://mainvps.net/blog/best-wordpress-hosting-providers/
- https://mainvps.net/blog/linux-vps-hosting-india/
- https://mainvps.net/blog/low-cost-windows-vps-hosting-in-india/
- https://mainvps.net/blog/cheap-dedicated-server-hosting-providers/
- https://mainvps.net/blog/windows-server-guide-dde-dns-tls-1-2-uptime/
- https://mainvps.net/blog/dedicated-server-hosting-netherlands/
- https://mainvps.net/blog/dedicated-server-low-price/
- https://mainvps.net/blog/vps-hosting-in-los-angeles-us/
- https://mainvps.net/blog/dedicated-server-in-nedzone-nl/
- https://mainvps.net/blog/buy-linux-vps-hosting/
- https://mainvps.net/blog/managed-windows-vps-hosting/
- https://mainvps.net/blog/what-is-wmi-provider-host-complete-guide/
- https://mainvps.net/blog/cloud-hosting-vs-vps-2026/
- https://mainvps.net/blog/vps-hosting-for-ecommerce-guide/
- https://mainvps.net/blog/vps-hosting-for-saas-applications/
- https://mainvps.net/blog/vps-reseller-hosting-in-netherlands/
- https://mainvps.net/blog/dedicated-server-hosting-in-us/
- https://mainvps.net/blog/dedicated-server-with-plesk-us/
- https://mainvps.net/blog/high-performance-dedicated-server-us/
- https://mainvps.net/blog/unmanaged-windows-vps-hosting/
- https://mainvps.net/blog/best-dedicated-server-web-hosting/
- https://mainvps.net/blog/best-managed-dedicated-server-hosting/