We’ve all been there: you sit down to enjoy your favorite snack and watch your favorite show, only to remember that it’s no longer available on Netflix. Or, worse yet, find that a movie you own as a digital copy is no longer available on any streaming service. It’s frustrating, isn’t it?
Streaming services are always changing their offerings, raising prices, and moving popular titles behind new levels of subscription. What’s available today may be gone tomorrow. It’s this kind of frustration that’s driving more and more people (including myself) to take matters into our own hands and build our own media server.
Rather than being at the mercy of Netflix, Prime, or Disney+, you can build your own media server to be your own personal Netflix full of your own movies, TV shows, music, and even home videos. No more surprise deletions. No more ads. No more geo-blocking. Just you and your media, whenever and wherever you want.
Why a Personal Media Server Makes Sense
A private media server gives you complete ownership and control. Once your content is added, it’s yours forever. You decide how it’s organized, who can access it, and how it’s streamed. Whether you’re watching on your phone during travel, on a smart TV at home, or sharing access with family members, everything stays under your control.
And unlike traditional home servers, you don’t have to worry about:
- Power outages
- Internet downtime at home
- Expensive hardware
- Running a noisy PC 24/7
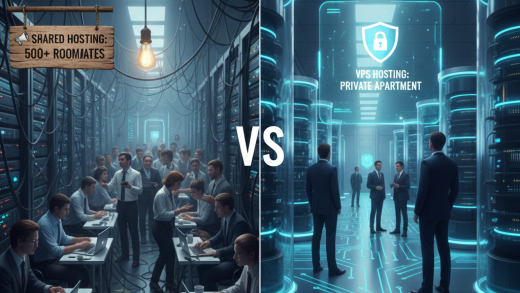
Why Stream from a VPS Instead of Home?
Sure, you can run Plex or Jellyfin on your home PC or NAS. I started that way too. It works until it doesn’t. Once you try to stream outside your home network, the cracks start to show.
Remote Access Is the First Pain Point
Home internet connections are designed for downloads, not uploads. This means that streaming from home to your phone, hotel TV, or a friend’s house will often fail or degrade due to buffering or quality issues, especially when traveling or abroad. A VPS, on the other hand, is part of a data center’s network with high, symmetrical speeds optimized for streaming.
Power, Heat, and Bandwidth Add Up
Leaving a computer, mini-PC, or NAS on 24/7 is not only a hassle, but it’s also costly in the long run. Consider the electricity, heat, noise, and hardware degradation. With a VPS, none of this matters. You pay a flat monthly fee, and your server will be up and running without breaking the bank or your hotel room.
Reliability: You Don’t Have to Babysit
Home networks use consumer-grade routers and powerline connections. Routers fail. ISPs fail. Power outages occur often at the worst possible time. Your VPS host is a professional data center with redundant power, network failovers, and monitoring, meaning your media server is always available, even when your home internet is down.
Improved Privacy and Control
Your VPS media server doesn’t record your viewing history, serve ads, or serve up content you didn’t want to watch. You control who gets access, what they get access to, and how they get to watch it. With proper security, your media is private and yours to control.
The “Upgrade” Moment
When I finally transplanted my Plex media server from my home network to a VPS, the experience was like night and day. It was like swapping out my old, crusty DVD player for a shiny streaming media player. Videos loaded in an instant. Remote connectivity simply worked. I could access my media library on my phone during commutes, stream on hotel Wi-Fi, or share access with loved ones abroad without the hassle of constant tinkering.
Home Servers Are Okay, But VPS Is Better for Streaming
Home servers are okay for local media or for personal projects. But for anywhere access, reliability, and hassle-free operation, a VPS is simply the better choice for streaming media.
After making the change, it’s difficult to go back. Streaming media from a VPS is more like what personal media should have been all along.
Plex vs. Jellyfin: Picking Your Streaming Platform
Both Plex and Jellyfin let you organize your media beautifully, but they’re a bit different in philosophy.
Plex
- The super-polished interface feels just like Netflix
- Apps on everything (smart TVs, Rokus, iPhones, even fridges someday probably)
- Plex Pass unlocks extras like DVR and hardware transcoding
- Some features sit behind a paywall
Jellyfin
- 100% free & open-source, no hidden fees
- Runs entirely under your control (no “phone home” stuff)
- Highly customizable for power users
- Fewer polished device apps (but web + mobile works great)
If you want plug-and-play simplicity, Plex is your friend.
If you value freedom, privacy, and zero cost, Jellyfin is a gem.
Personally? I run Jellyfin for myself (because I love open-source), but I keep Plex for family members who just want a “click and play” experience.
How to Set Up a VPS Media Server (Step-by-Step)
Don’t worry, you don’t need to be a Linux wizard. Here’s the roadmap I’ve used multiple times.
Step 1: Pick a VPS
For smooth streaming, start with:
- 2 CPU cores
- 2–4 GB RAM
- 50GB+ storage (scale up if you’ve got terabytes of movies)
- A provider with solid bandwidth (unmetered if possible)
If you’re aiming for 4K streaming with transcoding, go bigger—think 4 cores, 8GB RAM.
Step 2: Prep the VPS
Run updates first:
sudo apt update && sudo apt upgrade -y
Install Docker (makes life so much easier):
sudo apt install docker docker-compose -y
Step 3: Deploy Plex or Jellyfin
Here’s a simple Docker Compose setup:
Plex
version: '3'
services:
  plex:
    image: linuxserver/plex
    container_name: plex
    network_mode: host
    environment:
      - PUID=1000
      - PGID=1000
      - VERSION=docker
    volumes:
      - /home/user/plex/config:/config
      - /home/user/plex/media:/media
    restart: unless-stopped
Jellyfin
version: '3'
services:
  jellyfin:
    image: jellyfin/jellyfin
    container_name: jellyfin
    network_mode: host
    volumes:
      - /home/user/jellyfin/config:/config
      - /home/user/jellyfin/media:/media
    restart: unless-stopped
Then run:
docker-compose up -d
Step 4: Upload Your Media
Drag and drop your files using Cyberduck, FileZilla, or just scp via Terminal.
Step 5: Start Streaming
- Plex →
http://your-vps-ip:32400/web - Jellyfin →
http://your-vps-ip:8096
Congrats, you just built your own streaming service.
Pro Tips for Smooth Playback
Here’s where personal experience makes a difference:
- Use a domain + SSL → Instead of typing an IP, stream from
movies.mydomain.comHTTPS. - Enable transcoding → Plex makes this easy. Jellyfin does too, but may need tuning.
- Add a firewall → Only open the ports you really need. Security first.
- Use Sonarr/Radarr → They’ll auto-manage and fetch new episodes for you. Game-changer.
- Consider external storage → For huge libraries, pair VPS compute with cloud storage buckets.
Who Benefits Most from This?
A VPS-based media server isn’t just for hardcore tech users. It’s a practical solution for anyone who wants full control over their media without relying on streaming platforms.
Movie Buffs and Collectors
If you’ve spent years building a large movie or TV collection, a VPS allows you to centralize everything in one place. Whether it’s a 10TB archive of films, rare titles, or high-quality 4K content, your library stays organized, searchable, and accessible at all times.
Families and Households
Families benefit from a private, ad-free streaming environment. You can control what’s available, create separate user profiles, and avoid unpredictable recommendations. It’s a safer and more consistent viewing experience for everyone.
Travelers and Remote Workers
For frequent travelers, a VPS media server removes regional restrictions entirely. You can access your content from anywhere in the world without worrying about country-based limitations or unavailable titles.
Small Teams and Creators
Small teams often use VPS media servers to host training videos, internal media libraries, or creative projects. It’s a secure and efficient alternative to public platforms or file-sharing services.
The Personal Freedom Factor
For me, moving to a VPS meant no more explaining to friends abroad why something wasn’t available in their region. Instead, it became as simple as saying, “Here’s the login, enjoy.”
That’s the real advantage. No restrictions, no sudden removals, and no dependence on third-party platforms. Just your media, available when and where you want it.
Final Thoughts
Having a Plex or Jellyfin media server on a VPS is a game-changer. You’re no longer bound by content rotation, geo-blocks, or price gouging. You call the shots.
Plex is the best choice if you want something that “just works.” It’s got a clean interface, extensive device support, and easy setup, making it ideal for users who want a Netflix-like experience without the hassle.
Jellyfin, on the other hand, is a heaven for those who cherish freedom. It’s open-source, free, and gives you full control over your data without any subscriptions or locked functionality. If you like to tinker, customize, and remain independent of commercial services, Jellyfin is the way to go.
FAQs: VPS Media Streaming with Plex & Jellyfin
Q1: Can I stream 4K media on a VPS?
Yes, 4K streaming is possible on a VPS if you pick the right plan. You will want to aim for a minimum of 4 CPU cores, 8 GB of RAM, and NVMe storage. Direct play is preferred over transcoding, which requires more CPU power.
Q2: Is Plex Pass worth the money?
Plex Pass is worth the cost if you want the extra features that come with it, such as hardware transcoding, mobile downloads, DVR functionality, and improved user controls. For simple streaming, the free version is more than sufficient.
Q3: Can Jellyfin be used on smart TVs and media streamers?
Yes. Although some smart TVs lack Jellyfin apps, you can still stream content using Android TV, Apple TV, web browsers, Chromecast, and Kodi.
Q4: How private is a VPS-based media server?
Very private compared to commercial streaming services. You control the server, data, and access. With proper security (strong passwords and HTTPS), there’s no tracking, ads, or third-party monitoring.
Q5: Can I host other services on the same VPS?
Absolutely. Many users run VPNs, Nextcloud, websites, or automation tools alongside Plex or Jellyfin. Just make sure your VPS has enough resources to avoid performance issues.
Q6: Do I need a GPU for Plex or Jellyfin?
Not always. A CPU-only VPS works great for direct play. If you plan to transcode multiple streams or 4K content, hardware acceleration or a GPU can improve performance.
Q7: How much storage should I plan for?
That depends on your media quality. HD movies usually take 4–8 GB, while 4K movies can exceed 40–80 GB. Starting with 1–2 TB is common, and you can scale later.
Q8: Is running a media server on a VPS legal?
Yes, the software is legal. Just make sure you only host and stream content you legally own or have rights to, following your local copyright laws.
Q9: Can multiple people stream at the same time?
Yes. Multiple users can stream simultaneously, but each stream uses CPU, RAM, and bandwidth, especially if transcoding is involved. Choose your VPS plan accordingly.
Q10: Is a VPS better than running a server at home?
For many users, yes. A VPS offers better uptime, faster internet speeds, remote access, and fewer maintenance issues compared to home-based servers.
Suggestions:
- https://mainvps.net/blog/windows-server-guide-dde-dns-tls-1-2-uptime/
- https://mainvps.net/blog/how-to-install-moltbot-clawdbot-on-a-vps/
- https://mainvps.net/blog/cheap-dedicated-server-hosting-providers/
- https://mainvps.net/blog/vps-hosting-with-cpanel/
- https://mainvps.net/blog/mainvps-vs-bluehost-which-web-hosting-provider/