If you’ve ever tried hosting a website on shared hosting and hit a wall with performance, you already know the frustration. Limited resources, security risks, and a lack of control make it difficult to scale or customize your environment. Slow loading times, downtime during traffic spikes, and restrictions on software installations can hinder both user experience and business growth.
That’s when many businesses, developers, and growing websites turn to a Windows VPS (Virtual Private Server), a solution that combines dedicated resources, full administrative control, scalability, and robust security. With a VPS, you can install custom software, configure server settings to meet your exact needs, and ensure your applications run smoothly even under high traffic.
In this article, I’ll guide you through creating and setting up a VPS step by step, sharing practical tips from real-world deployments. By the end of this guide, you’ll have a secure, well-optimized, and flexible Windows environment capable of hosting websites, business applications, and other projects with confidence. You’ll also learn how to maintain performance, implement security best practices, and scale your server resources as your needs grow, making your VPS a reliable foundation for long-term online success.
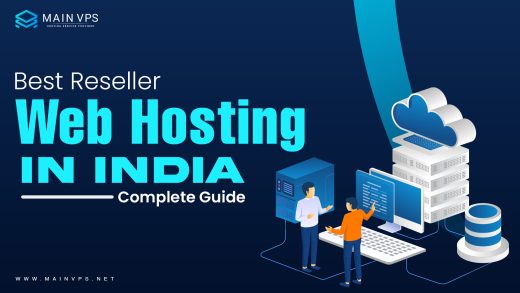
Why Choose Windows VPS for Web Hosting?
Windows VPS hosting is especially sought-after by developers and companies who use Microsoft’s ecosystem. Contrary to Linux servers, which are a bit slower, the VPS lets you use ASP.NET software, MSSQL databases, and Windows-based software effortlessly.
Here’s why people pick VPS over other options:
- Familiar interface: If you’ve used Windows on your PC, you’ll feel right at home.
- .NET and MSSQL support: Essential for Microsoft-based apps and enterprise solutions.
- Remote Desktop Access (RDP): Manage your server with a full graphical interface.
- Dedicated resources: CPU, RAM, and storage that are not shared with noisy neighbours.
- Scalability: Start small and scale up as traffic grows.
Pro Insight: I’ve seen many small businesses switch from shared hosting to VPS and instantly notice faster site speeds, especially when running database-heavy apps.
Step 1: Choose the Right VPS Plan
Not all VPS plans are created equal. Before setting up your server, carefully consider your specific requirements to ensure optimal performance and scalability:
Website traffic → Low-traffic websites or small business pages can work well with 2 GB RAM and 1 vCPU, while high-traffic sites, eCommerce stores, or applications with heavy database usage may require 4–8 GB RAM or more.
Applications → If you plan to run MSSQL databases, .NET applications, or multiple services simultaneously, choose higher RAM, SSD/NVMe storage, and adequate CPU resources to prevent slowdowns.
Storage type → SSD or NVMe storage provides faster data access and better overall performance compared to traditional HDD.
Server location → Select a server geographically close to your target audience (India, USA, Europe) to reduce latency and improve load times.
Managed vs unmanaged → Decide if you need a managed VPS with technical support or if you are comfortable managing updates, security, and server configurations yourself.
At MainVPS, we provide VPS plans in India, Europe, and the USA, optimized for speed, reliability, and uptime. Choosing the right plan upfront ensures smooth performance as your website or application grows.
Step 2: Connect to Your Windows VPS
Once you’ve purchased your plan, the next step is securely accessing your server and starting the setup process.
Get your credentials → Your hosting provider will send you the VPS IP address, username (usually
Administrator), and password. Keep these details secure.Open Remote Desktop Connection (RDP) →
- Windows → Search for “Remote Desktop Connection” in the Start Menu.
- Mac → Download and use Microsoft Remote Desktop (free on the App Store).
- Linux → Use Remmina or similar RDP clients.
- Enter VPS details → Input your server’s IP address, username, and password.
Connect securely → After connecting, you’ll see the VPS desktop environment, just like a regular Windows PC.
Initial setup tips →
- Change the default password immediately for security.
- Install system updates to ensure your server is protected.
- Configure Windows Firewall and enable automatic updates.
- Create a snapshot or backup of your clean server setup before installing applications.
Following these steps carefully ensures that your VPS is ready for further configuration and hosting your websites or applications securely and efficiently.
Step 3: Secure Your Windows VPS (Don’t Skip This)
Security is often where beginners make mistakes. A VPS is powerful, but with great power comes great responsibility.
Security Best Practices:
- Change the default Administrator password immediately.
- Enable Windows Firewall and only allow necessary ports (e.g., 80/443 for web, 3389 for RDP).
- Keep Windows updated with automatic security patches.
- Install antivirus & anti-malware tools (Windows Defender is a good start).
- Set up regular backups to protect against data loss.
- Restrict RDP access by whitelisting* IPs or changing the RDP port.
Pro Insight: I always recommend enabling fail2ban-like security or intrusion prevention to block repeated login attempts. Brute force attacks on RDP are common.
Step 4: Install a Web Server (IIS or Alternative)
To host websites, you’ll need a web server. On Windows, the go-to option is IIS (Internet Information Services).
- Install IIS:
- Open Server Manager → Manage → Add Roles and Features.
- Select Web Server (IIS) and complete the setup.
- Configure IIS:
- Add your website files to
C:\inetpub\wwwroot. - Set up bindings for your domain name (example.com).
- Enable HTTPS with an SSL certificate (Let’s Encrypt or commercial SSL).
- Add your website files to
- Optional: Install PHP Manager for IIS if you’re running PHP-based apps like WordPress.
Alternative: If you prefer open-source stacks, you can also install Apache or Nginx on Windows, though IIS integrates best.
Step 5: Optimize for Performance and Scalability
Hosting isn’t just about “getting it to work.” To truly scale, you need to optimize.
Performance Tips:
- Enable caching in IIS to reduce server load.
- Use SSD storage for faster database queries.
- Enable HTTP/2 & compression for better load times.
- Scale resources as needed (CPU, RAM) when traffic grows.
- Monitor performance with tools like Windows Performance Monitor.
Pro Insights: A client of mine who runs a busy WooCommerce website using a VPS reduced page load times by 40% by enabling HTTP/2 as well as upgrading the site to SSD Storage with NVMe.
Step 6: Add Databases and Applications
Most websites and applications require a database to store and manage data. With a VPS, you have several options depending on your project needs:
Microsoft SQL Server (MSSQL) → Best suited for ASP.NET applications and enterprise-level projects that rely on Microsoft technologies.
MySQL/MariaDB → Ideal for PHP-based applications like WordPress, Joomla, or Magento.
PostgreSQL → A strong choice for enterprise-grade applications requiring advanced data handling and analytics.
Best practices when adding databases:
Create dedicated database users with strong passwords instead of using default admin accounts.
Set proper permissions for each database to restrict access and enhance security.
Enable remote access only if necessary, and limit it to specific IPs.
Regularly schedule database backups and store them in a secure location.
Monitor database performance using built-in tools or third-party monitoring software to identify slow queries and optimize indexes.
After installing your database, install and configure your applications. Ensure that your applications connect correctly to the database and test all functionality in a staging environment before going live.
Step 7: Test, Monitor, and Maintain
Before launching your website or application, thorough testing and ongoing monitoring are essential to ensure reliability, security, and performance:
Testing checklist:
- Confirm that your domain resolves correctly to the VPS IP.
- Verify that SSL certificates are installed and active.
- Test load times and page speed, optimizing resources if necessary.
- Scan for open ports and services that could expose your server to security risks.
- Check that all applications and scripts function as intended.
Monitoring and maintenance:
- Regularly check server logs for unusual activity or errors.
- Keep Windows updates, applications, and security patches up to date.
- Monitor CPU, RAM, and disk usage to ensure resources are sufficient for traffic demands.
- Schedule and maintain regular backups, including databases and configuration files.
- Scale resources proactively as traffic grows to avoid performance bottlenecks.
- Consider setting up alerts for downtime, high CPU usage, or security threats.
Pro Insight: Treat your VPS as a living system. Regular monitoring, timely updates, and proactive optimization ensure long-term performance, security, and reliability for your websites and applications. A well-maintained VPS can handle growing traffic, prevent security breaches, and provide a stable environment for all your projects.
Final Thoughts
A VPS bridges the gap between affordability and enterprise-level hosting, offering dedicated resources, full control, and scalability without the cost of a dedicated server.
For developers → freedom to customize and experiment.
For businesses → reliable, secure, and scalable hosting.
For agencies → a professional solution to manage client projects.
By following this guide from securing RDP and configuring IIS to optimizing performance, you can create a secure, high-performing VPS environment that grows with your needs. With proper setup and management, your VPS becomes a dependable foundation for websites, applications, and business-critical projects.
Looking for Windows VPS hosting in India or the USA Windows VPS? At MainVPS, we offer high-performance VPS plans built for security, speed, and scalability.
FAQs:
Q1: Is VPS better than Linux VPS for web hosting?
It depends. Windows is better for ASP.NET and MSSQL apps. Linux is preferred for PHP/MySQL projects like WordPress.
Q2: Do I need a license for Windows Server on VPS?
Yes. Reputable providers (like MainVPS) include a licensed Windows Server with your VPS plan.
Q3: Can I host multiple websites on one VPS?
Absolutely. IIS lets you host multiple domains and applications.
Q4: Is VPS secure?
Yes, if configured properly, change passwords, enable firewalls, and keep patches updated.
Q5: Can I scale my VPS later?
Yes. Most providers allow you to increase CPU, RAM, and storage without downtime.
Q6: Can I run ASP.NET applications on a VPS?
Yes. A VPS is ideal for ASP.NET and ASP.NET Core applications because it natively supports IIS and Microsoft frameworks.
Q7: What control panel can I use on a VPS?
Popular options include Plesk and WebHost Edition, which simplify website, database, and email management.
Q8: Do I need technical skills to manage a VPS?
Basic knowledge helps, but RDP and managed VPS services make it accessible even for beginners.
Q9: How often should I back up my VPS?
Regular backups are essential, and daily or weekly backups are recommended depending on data changes, using Windows Server Backup or cloud solutions.
Q10: When should I upgrade from shared hosting to a VPS?
Upgrade when your website experiences slow performance, high traffic, security concerns, or when you need more control and custom configurations.
Suggestions:
- https://mainvps.net/blog/almalinux-vs-ubuntu-enterprise-hosting/
- https://mainvps.net/blog/debian-minimal-setup-secure-web-hosting/
- https://mainvps.net/blog/web-hosting-services-in-hyderabad/
- https://mainvps.net/blog/windows-hosting-in-india/
- https://mainvps.net/blog/cheap-wordpress-hosting-in-india/
- https://mainvps.net/blog/linux-reseller-hosting/
- https://mainvps.net/blog/lifetime-web-hosting-2026/
- https://mainvps.net/blog/windows-reseller-web-hosting/
- https://mainvps.net/blog/best-wordpress-hosting-providers/
- https://mainvps.net/blog/linux-vps-hosting-india/
- https://mainvps.net/blog/low-cost-windows-vps-hosting-in-india/
- https://mainvps.net/blog/cheap-dedicated-server-hosting-providers/
- https://mainvps.net/blog/windows-server-guide-dde-dns-tls-1-2-uptime/
- https://mainvps.net/blog/dedicated-server-hosting-netherlands/
- https://mainvps.net/blog/dedicated-server-low-price/
- https://mainvps.net/blog/vps-hosting-in-los-angeles-us/
- https://mainvps.net/blog/dedicated-server-in-nedzone-nl/